Published September 20, 2026
Nana May’s Quite Possibly Best and Most Reliable Kiwi Pavlova Recipe
The Genuine Kiwi Pavlova: 17 Tips for a Beautifully Crisp, Marshmallow-Centred Pav
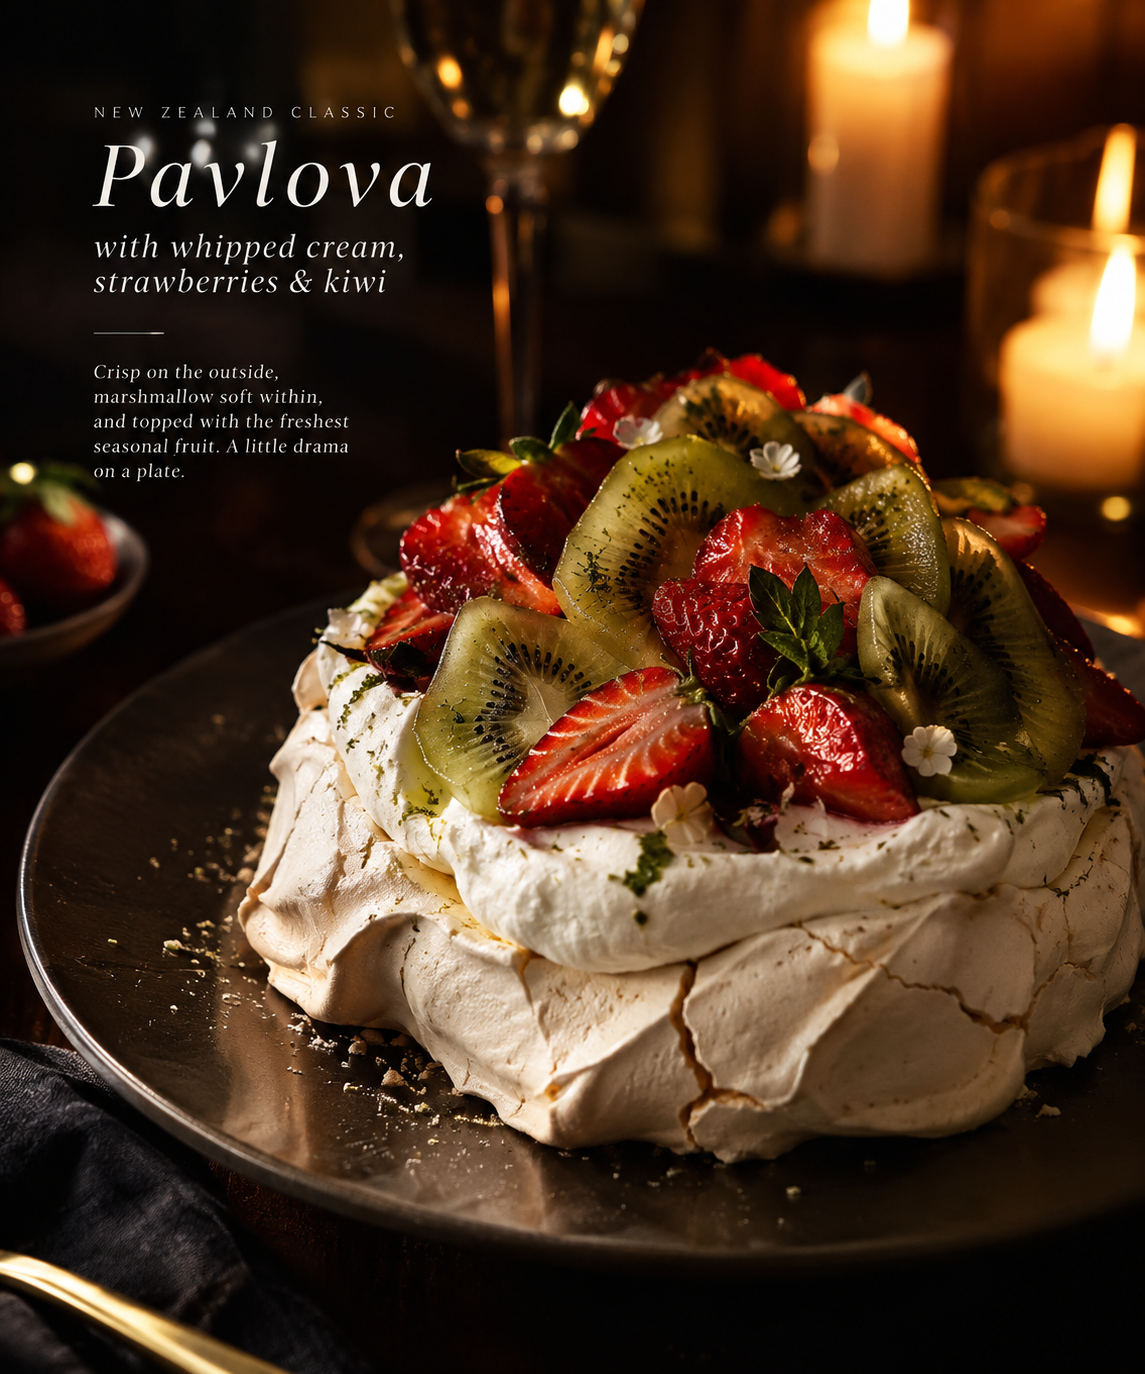
Whipped cream, delicious. Strawberries, fresh and sweet. Thinly sliced kiwifruit, a little tart but distinctive, plus a little bit of New Zealand pride.
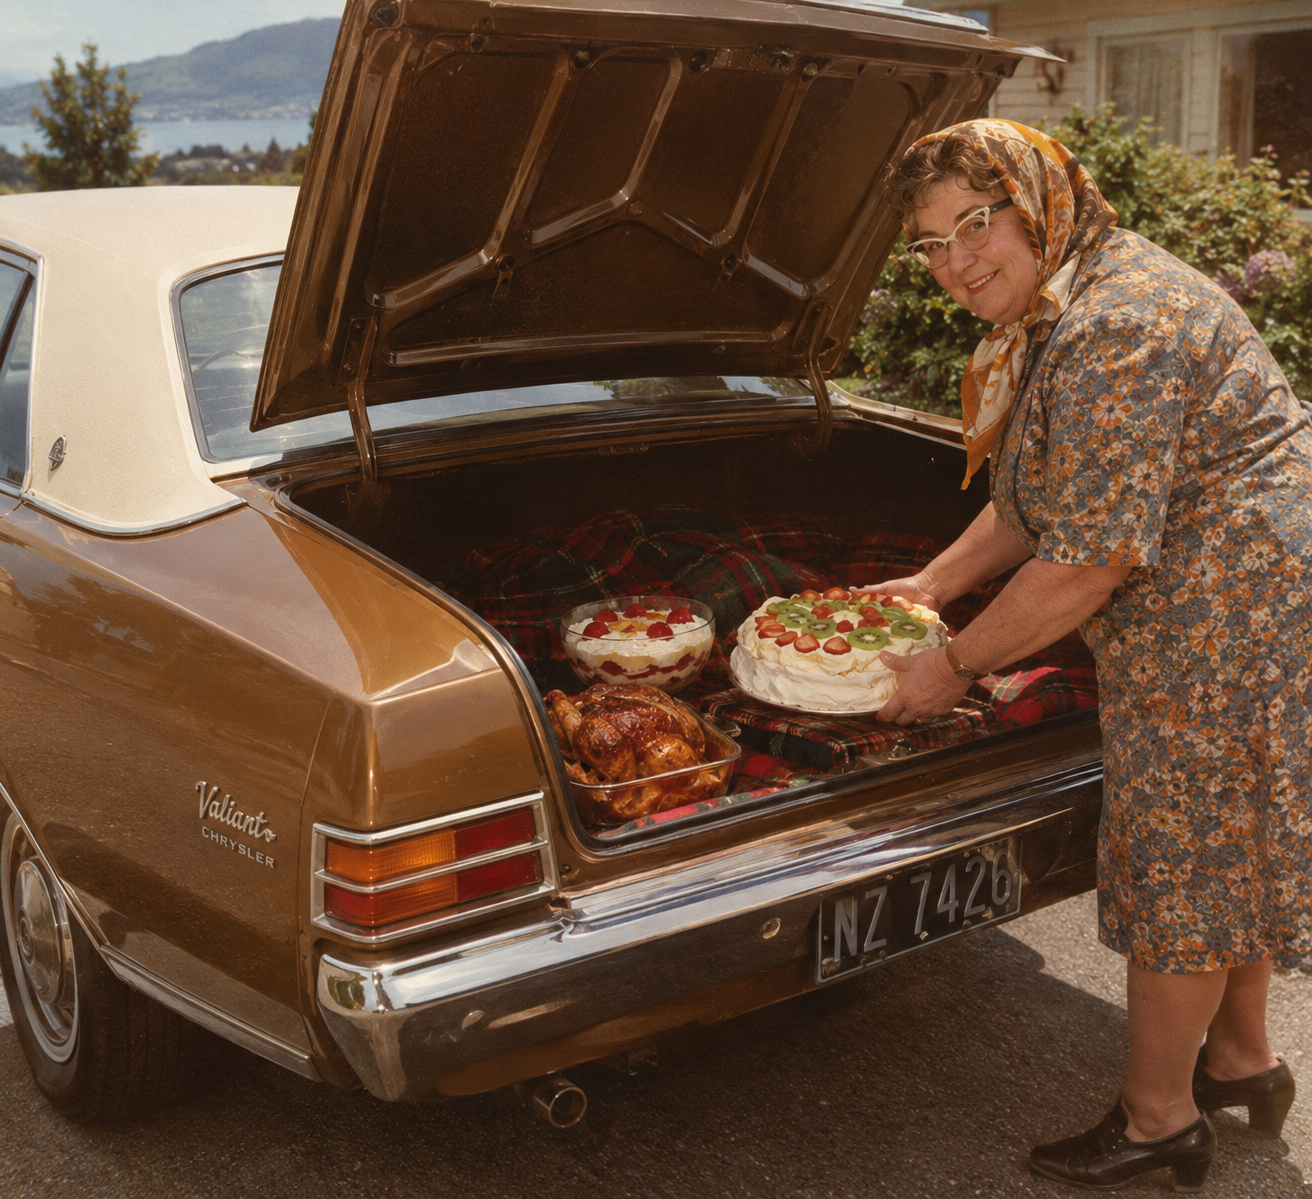
I've enjoyed plenty of Pavlovas over the years, and while there are countless tips online promising a foolproof result, some of the most useful lessons come from my Nana May, who regularly prepared a Trifle, a Pav along with roast bird and veggies, trekking all the way from Berhampore to Trentham in the boot (trunk for the US) of the Valiant with these delicious Sunday lunch staples.
Ahhhh 1970’s New Zealand.
The Best-Ever NZ Pavlova
Serves: 8–10
Prep: 20 minutes
Bake: 90 minutes + cooling
Pavlova
6 large egg whites, room temperature
330 g caster sugar
2 tsp cornflour
1 tsp white vinegar
1 tsp vanilla extract
Pinch of salt
Topping
500 ml cold whipping cream
1–2 tbsp icing sugar
1 tsp vanilla
Fresh strawberries
2–3 kiwifruit, peeled and very thinly sliced
Method
1. Get the oven ready
Heat the oven to 150°C conventional / 130°C fan bake. Line a baking tray with baking paper and draw a 22 cm circle as a guide, then turn the paper over.
2. Make the meringue
Beat the egg whites with the salt until they form soft peaks.
Add the caster sugar one tablespoon at a time, beating continuously. Take your time here. The finished mixture should be exceptionally thick, glossy and hold stiff peaks. Rub a little between your fingers. It should feel smooth rather than gritty.
Beat in the cornflour, vinegar and vanilla just until incorporated.
3. Build the Pav
Pile the mixture onto the circle, keeping the sides relatively high and making a shallow depression in the centre for the cream.
For that classic Pavlova character, don't make it too perfect. A slightly rustic, craggy exterior gives you more delicious crisp edges.
4. Bake
Put it into the oven and immediately reduce the temperature to:
120°C conventional / 100°C fan bake
Bake for 90 minutes.
Then turn the oven off and leave the Pavlova inside until completely cold. Ideally, leave it overnight.
This slow cooling is one of the secrets to getting that lovely contrast between crisp shell and soft centre.
5. Finish it
Whip the cream with the icing sugar and vanilla until thick but still soft.
Spoon it generously over the Pavlova.
Then comes the important bit: strawberries and kiwifruit. Don't drown the Pavlova in fruit. You want enough acidity to cut through the sweetness while still letting the meringue be the star.
The rules for a seriously good Pav
Use caster sugar, not ordinary granulated sugar.
Room-temperature egg whites whip more easily.
Add sugar slowly. This is probably the biggest difference between a good Pav and a great one.
Don't overbeat once the sugar has incorporated.
Don't open the oven door while it is cooking.
Don't worry about a few cracks. A Pavlova without cracks is suspicious.
Make it the day before if you can.
Add the cream and fruit relatively close to serving.
And, naturally, wafer thin slices of kiwifruit belongs on it.
The ideal result is crunchy outside, chewy around the edges and almost cloud-like marshmallow in the centre. That contrast is what makes a proper Pavlova rather magnificent.
Now for my Nana-May-inspired collection of practical Pavlova tips, adapted for the modern Kiwi kitchen, from egg selection and preparation to the all-important New Zealand weather forecast.
1. Measure your egg whites by volume
This is one of the most important tips. Four egg whites can vary considerably in volume depending on the size of your eggs and how much white you manage to extract. Since the amount of egg white is central to getting the right balance of ingredients, measuring by volume helps you achieve more consistent results.
Don't simply assume that four eggs will always produce exactly the same amount of egg white. A little attention at the beginning can save a lot of disappointment later.
2. Use fresh, good-quality eggs
Use fresh eggs from the supermarket or your local supplier rather than eggs that have been sitting in the back of the fridge for weeks.
If you have your own chickens, lucky you. Freshly laid eggs can take longer to whip into a stable foam, so eggs that have been stored for a few days may be more suitable for Pavlova. Around five days or older is a practical guideline.
3. Separate your eggs while they're cold
Separating eggs is easier when they're fridge-cold because the yolks are firmer and less likely to break. Separate the eggs first, then allow the whites to come to room temperature before whipping.
If you're new to separating eggs, you can carefully crack an egg into your hand and allow the white to slip through your fingers, leaving the yolk behind. Make sure your hands are clean, of course.
4. Not even a drop of yolk
Egg yolk contains fat, and even a small amount can interfere with the egg whites whipping properly. If you accidentally break a yolk into your whites, you can try removing it with an eggshell, but if there's any doubt that the whites have been contaminated, start again.
It's not worth risking an entire Pavlova for the sake of one egg.
5. Bring your egg whites to room temperature
Once separated, let the egg whites come to room temperature before whipping. They generally whip more readily than cold whites, helping you achieve the volume and texture needed for a good meringue.
Cold separation, room-temperature whipping. Simple.
6. Keep your bowl and whisk clean and dry
Any grease, oil or moisture in your mixing bowl or on your whisk can interfere with the egg whites. Make sure everything is thoroughly clean and dry before you begin.
A stainless steel or glass bowl is a reliable choice. And don't be tempted to use a bowl that still has traces of butter or other baking ingredients lurking around the edges.
7. Use an inverted cake tin to help shape your Pav
An inverted cake tin can help you create a more consistent shape without having to draw circles on baking paper. It can also make transferring your finished Pavlova to a serving platter easier.
The last thing you want is to pull a beautiful Pav out of the oven, only to have it crack or break when you move it. A little planning at the shaping stage can help.
8. New Zealand weather warning: Heat and humidity
Pavlova might be a classic Kiwi summer dessert, but hot and humid conditions can make it more challenging to produce a stable meringue.
Humidity can affect the texture of the meringue and contribute to softening, cracking or collapse. New Zealand's summer weather can vary considerably, from warm and dry to hot and sticky, so it's worth paying attention to the conditions in your kitchen.
And remember, even when the weather outside looks perfect for a summer gathering, the kitchen may have other ideas.
9. Bigger isn't always better
We all love the idea of a giant Pavlova, particularly when you're preparing dessert for a family gathering or Christmas lunch. But if you're baking in warm conditions, a smaller Pavlova can be easier to manage.
A four-egg Pavlova can provide a generous dessert for around 8 to 10 people, depending on the size of the servings. Larger Pavlovas can be more vulnerable to cracking or collapsing, especially if the structure hasn't been adequately dried.
Save the truly enormous Pavlova for when conditions are more forgiving.
10. Don't make your Pavlova too tall
A tall Pavlova looks impressive, but height can increase the risk of structural instability and cracking.
A flatter, slightly domed shape can provide a more reliable result, particularly in warmer weather. You want a meringue that's crisp on the outside and beautifully marshmallow-like in the middle, not one that collapses under its own ambition.
There's a lesson in that for agencies, too. Ambition is wonderful, but the right structure matters.
11. Give the edges a gentle slope
A Pavlova with perfectly vertical, smooth sides might look like a beautiful cake, but it can be more fragile. A gently sloping, dome-like shape with a slightly textured surface can help support the structure.
Don't worry about achieving absolute perfection. A Pavlova has a certain rustic charm, and the cream and fruit will cover a multitude of imperfections.
Besides, the best Pavlovas aren't necessarily the ones that look perfect before they're topped. They're the ones that taste fantastic when they reach the table.
12. Start with a higher oven temperature, then turn it down
Beginning at a higher temperature helps the outer crust form before the oven temperature is reduced for the longer baking period.
The initial heat helps establish the meringue's structure, while the lower temperature allows the inside to dry gradually without excessive browning.
Follow the temperature guidance in your specific recipe, as ovens vary and fan-forced and conventional settings can produce different results.
13. Bake low and slow
A low baking temperature helps preserve the Pavlova's characteristic pale colour and delicate texture.
A longer bake at a lower temperature allows the meringue to dry gradually, reducing the likelihood of excessive puffing followed by collapse. The goal is a crisp exterior with a soft, marshmallow-like centre.
Don't rush the process. Pavlova rewards patience.
14. No peeking, and no thundering through the kitchen
Seriously, this matters.
Opening the oven door releases heat and can interfere with the baking environment. Sudden temperature changes may contribute to cracking or collapse.
And if you've got wooden floors, try not to charge through the kitchen like a herd of cattle during the crucial stages of baking.
The meringue has collapsed. Did someone open the studio door too early?
Or was it someone asking for "just one small change" before the Pav had properly set?
Whether it's a Pavlova or an agency project, sometimes the best thing you can do is leave it alone while it's doing its thing.
15. Let your Pavlova cool gradually in the oven
Once the Pavlova has finished baking, turn off the oven and leave it inside to cool gradually. Depending on your recipe and oven, you can leave it overnight or for several hours.
Gradual cooling helps reduce the risk of sudden temperature changes, which can contribute to cracking.
And when it's warm or humid outside, a switched-off oven can offer a more controlled environment than leaving your Pavlova exposed on the kitchen bench.
Just make sure everyone in the household knows it's in there before they decide to turn the oven on.
16. Be gentle when adding your toppings
This is where the finished Pavlova can be particularly vulnerable.
Don't dump a bowl of strawberries onto the meringue and expect it to cope. Carefully place the whipped cream and fruit on top, using a gentle hand to distribute the weight.
The meringue is delicate, and too much pressure can cause it to crack or sink.
A little patience makes a difference.
17. Make extra whipped cream
Not just for serving.
Extra cream can help disguise cracks, soften the appearance of a collapsed section and make the whole Pavlova look more generous and inviting.
That's one of the beautiful things about Pavlova. Even if it hasn't turned out exactly as planned, a little whipped cream, strawberries and thinly sliced kiwifruit can transform it into something wonderfully presentable.
And let's be honest, nobody is going to complain about extra cream.
The genuine Kiwi Pavlova
Follow these tips and you'll give yourself a better chance of producing a Pavlova with a crisp outer shell, a soft marshmallow centre and the kind of finish that makes everyone gasp when you bring it to the table.
Top it generously with softly whipped cream, strawberries and thinly sliced kiwifruit. Add passionfruit if you’re extra fancy or from Kendallah, or use whatever fresh fruit is looking good at the time.
And then reflect in the glory of the moment when you place it on the table to a standing ovation. You've earned it.
Because a Pavlova, much like a great agency project, is about bringing the right ingredients together. The structure, the balance, the texture and the finishing touches all matter.
Get it right, and you've got something delicious.
Get it slightly wrong, and you can always shoot down to the Bellbird dairy for more cream.




Sign up for our newsletter.
We partner with some extraordinary organisations